![]()
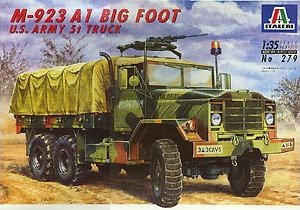
M-923 A1 BIG
FOOT
U.S. ARMY 5t TRUCK
Italeri
297
1/35
Check my review of the model >here<. Initially (several years ago) I decided to build this model "out of the box" and almost finished it. On the picture below you can see how it looked back then. I thought that It only required some detail painting, decals and a lot of weathering to be done. This poor model was waiting a few years in this condition, as I had a long break from the modeling recently after problems with my old airbrush. In fact I could have finished it without an airbrush, as the rest of the painting job could be done by hand brushing, but as I've suspended all modeling activities, this model also had to wait.
Model, as it was originally built, looked quite well at first sight, maybe except for the tires that are very poorly reproduced in the kit - some resin replacement was necessary to enhance the overall look of the model. At first I thought that I'll leave wheels as they were, but later I changed my mind and ordered CAM Decals and CMK sets of resin tires for this truck. Check my review and comparison of both sets here. The winner was CAM set - their wheels are now on my model.
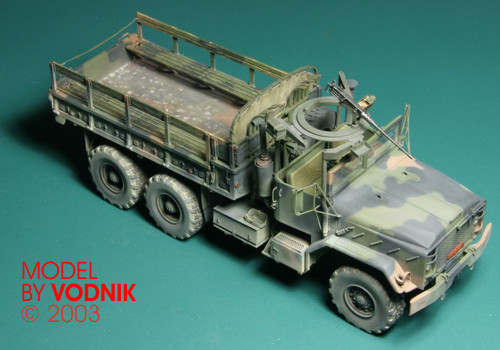
Photo above shows how the model looked like on January 14th, 2003.
It was almost finished - completely "OOtB". There were still some
details to be painted
and of course it required a lot of weathering to give it more realistic
appearance.
But I decided to re-do the model completely.
After I started to work on this model again recently, I changed my mind about the way I want to finish it. First off all, I found a subject I want to model, or at least I will try to build my model in similar configuration as the truck shown on the picture below.
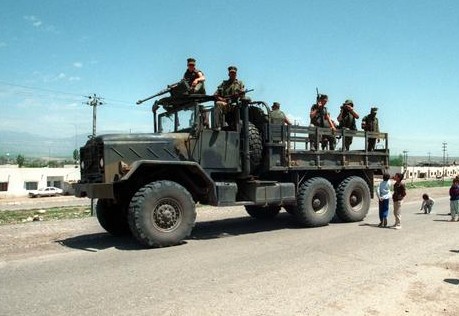
As you can see it has no canvas covers installed, so I had to work a bit more on the cabin interior and cargo bed. I purchased Eduard PE set for Big Foot and there are parts that really enhance the look of the model. I also bought a resin detail set for Big Foot from Real Models company. It is quite poor set, but some parts were usable.
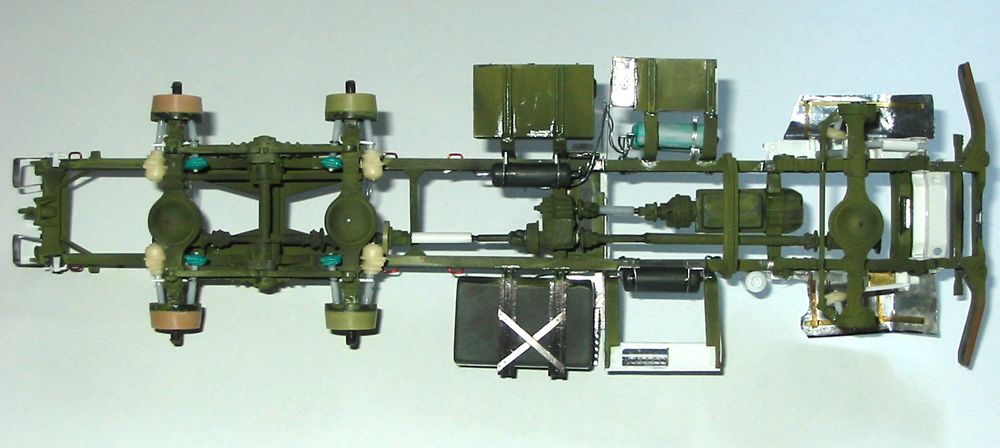
I started by enhancing the look of cargo bay - I disassembled it and used sandpaper to remove most of the wooden floor texture and applied a sheet of thin styrene over it (bed floor of M939 series trucks is made of two welded steel plates, not of wood). I also thinned the bed side walls with sandpaper and applied sheets of styrene over their interior sides. I first drilled holes in the styrene sheets to represent holes in which scratch built tiedowns were installed later. After I did it for one side of the cargo bay, I decided to put it aside and move to the suspension. By this time I disassembled the model completely and basically started to build it from the start. I did not remove the paint however - I used some steel wool to smooth the surface in some places and paint was removed by sanding in some other, but generally I decided I can put a new layer of paint on the old one.
To detail the suspension I used some resin parts from Real Models set (brakes), many parts from Eduard PE set and A LOT of scratch built details. Italeri did a very poor job on this part of the model - actually only the basic frame, transmission, transfer case, leaf springs and axles remained from the original kit, everything else was added or heavily modified.
Below are a few pictures of the finished suspension (click on each picture to see larger version in new window).
|
|
|
|
Complete suspension. As you can see the green paint has not been completely removed from the frame and other original kit parts. Some of the added and modified parts are: new bumperettes (PE from Eduard), tiny emergency and service air couplings, wire handles on the frame, brake air chambers (Real Models plus four green resin copies I made, installed on styrene rods), brake assemblies on all rear axles, modified propeller shafts, new fuel tank mounting brackets (Eduard), additional air tanks, new steps (some PE parts from Eduard and also some scratch built plastic parts) and many others... You can also notice that transmission box was modified and moved forward to where it should actually be! |
|
|
|
|
|
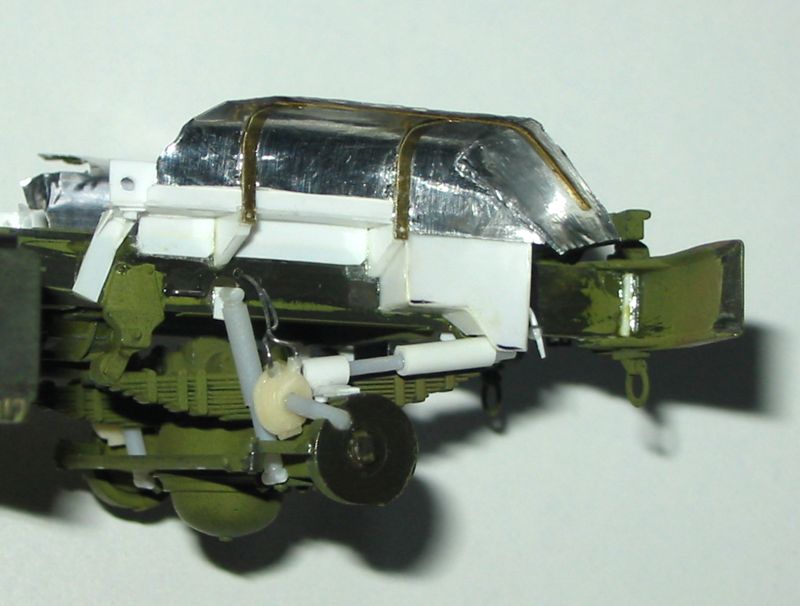
Here you can see how many parts were missing around the front wheels. Shock absorbers, power steering cylinder, brake chamber and new splash guard were added. The floor of the cabin had to be modified to accept these new added splash guards. |
Again the area behind the front wheel, left side this time. Here you can see scratch built steering gear assembly with brass cover and brake chamber with some air lines. Splash guard with support structure was also scratch built. You may also notice tiny air coupling behind the bumper. |
|
|
|
|
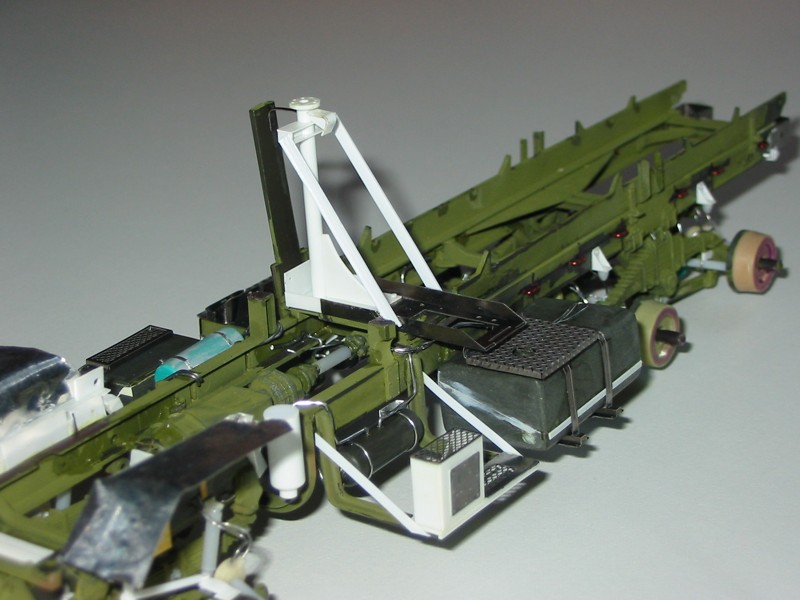
On this
photo you can clearly see new scratch built spare wheel carrier. |
|
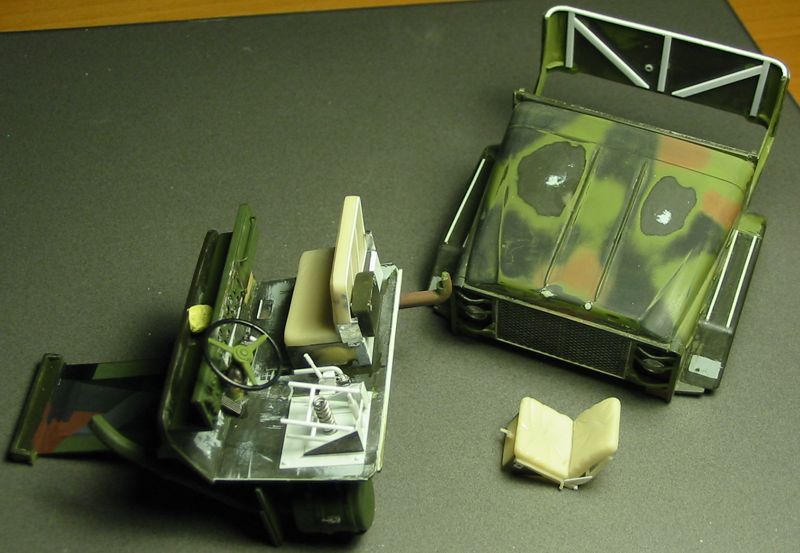
Once the suspension was finished I painted it and then started working on the cab. Below is a few photos that show various details I added.
|
|
|
|
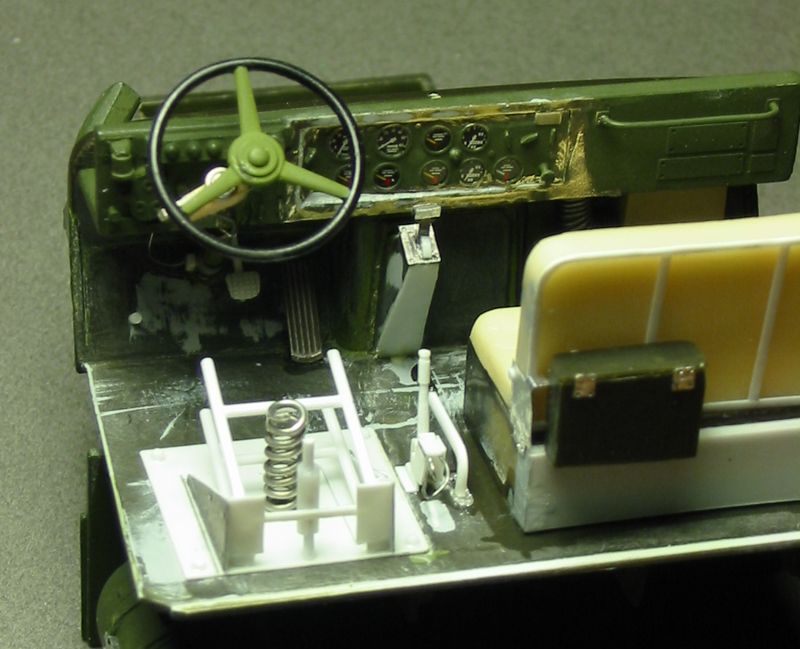
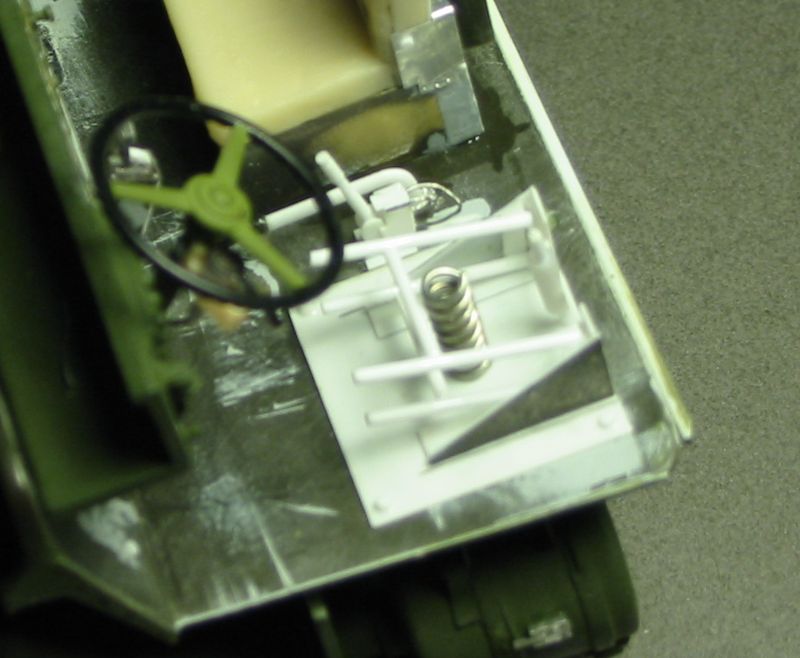
Passenger seat cushions are cut from resin Real Models part. There are also some PE parts from Eduard used in the cab interior (e.g. dashboard). Gauges panel is acetate sheet from Eduard set. All white parts are scratch built from styrene. |
Similar picture as previous one. Dashboard was already painted once to prepare it for attachment of acetate film, but now requires another cote (gauges will need to be masked). Colors on the steering wheel are old paint - it should not be black and will be painted again. Support column of transmission selector lever was modified to correct shape. |
 |
 |
| And yet another similar picture. Map box has been added to the back of passenger seat. | Here you can see details of driver's seat suspension. Also note scratch built parking brake and transfer shift levers on the floor. Hardly visible is the turn signal lever on the steering wheel shaft. |
 |
|
| On this photo you can see driver's seat - cushions are again from Real Model parts, but they are exactly the same as plastic parts in the kit. But the construction that cushions seat on is a mixture of RM resin, Eduard PE and styrene. The rear wall of the cab has strengthening beams added from styrene. Also note added stiffening "ribs" on fenders. | |
....................
I will not add any more information to this page. My model is now finished. I will prepare a new article in Features section - part of it is already available >here<. There are also some pictures of my model in the Galleries section.
![]()
![]()
Copyright © 2003 VODNIK, mailto:pawel@vodnik.net