![]()
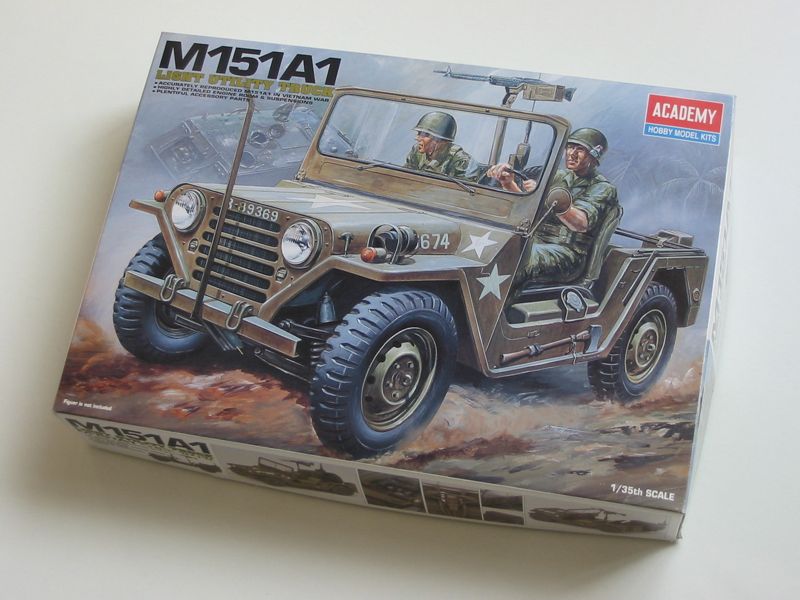
M151A1
Light Utility Truck
Academy 1323
1/35
M151 Ford MUTT (Military Utility Tactical Truck) 1/4 ton utility truck was introduced to US Army service in 1960 as a replacement of ageing Willy's MB and M38A1 jeeps. It had integral chassis/body unit, all-wheel independent suspension and 24-volt waterproof electrical system. In 1964 the production of new version, M151A1 has started. It was modified to carry heavier weapons and other loads and featured strengthened rear suspension. This version of the vehicle was used in large numbers during the Vietnam war in many variants - including among others up-armored variants used as convoy escort and M151A1C version with the recoilless rifle installed. In 1969 the new M151A2 version was introduced and quickly replaced most older vehicles. Surprisingly some examples of M151A1 variant were still in use in US Army in Europe as late as in 1986 - the best proof is on the front cover of the Warmachines No. 14 book by Verlinden Publications. The main difference between variants was the completely new rear suspension: independent swinging A-frame of A1 version was changed to semi-trailing arm set-up in A2, where the rear wheels always remained vertical, while in older version wheels cambered in and out according to load and terrain, what made the vehicle very unstable in turns at higher speeds. There were also other modifications made to A2 version, like one piece safety glass windshield, new collapsible steering column and dished steering wheel, new taillights, turn and blackout lamps (front fenders were modified to accept bigger lamps), lifting shackles mounted on the rear body sides behind the rear wheels and electric motors for windshield wipers. It is important to list these modifications, as Academy made some mistakes and introduced some features of A2 variant to this M151A1 kit.
The kit comes in a top opening box with a nice picture on it. The author of this illustration made one mistake: the windscreen is shown as one piece, while it should be in two halves. The model itself however features correct windscreen. In the box there are 3 sprues of dark green plastic, complete truck body as a separate part and one small sprue of clear parts. Clear parts are for the windscreen (one piece of clear plastic, but with the molded on slat dividing it in half) and main front lights lenses, but there are also clear parts for front turn signal lights, marker lights and reflectors. You get six reflectors, while only two are needed for this model. Interesting parts on the clear sprue are two "glass" shields for goggles - but there is no figure in this kit! You also get seven (!) soft vinyl tires - a clear sign that a version of a kit with a trailer is coming from Academy soon (probably additional reflectors are also meant for the trailer). Typically for Academy you get a tube of cement - I wonder if anyone is using it?... There is of course a folded instruction sheet and a small decal sheet.

The contents of the box. Seven soft vinyl tires in the kit
mean that a version with a trailer will be released soon.
Click on photo to see enlarged version.
14 step instructions are quite clear and easy to follow. There is a table with a list of colors in several languages, but no recommendation of any particular paint brand. There are color references throughout the instructions and there is painting and decal placement at the end of it. But here I discovered quite strange, but also funny omission. Academy shows you what colors to use for many details, but they forgot to write what color should the whole truck be! :-) Olive Drab is listed in the color table, but not mentioned in the main painting guide. I carefully checked the whole instructions and this color is only suggested for radio, ammo box and a single part in the engine. Doh... Decals are supplied for two vehicles - both from Vietnam. Marking consists of white stars in two sizes, bumper numbers and vehicle numbers for the engine hood. There is also several data placards supplied, most for the dashboard. Also instrument faces are supplied as a decal, although there is very fine raised detail on gauges, so you can reveal it by dry brushing and omit the decal. There are two extra decals supplied - one big and one small white star - and it is clearly indicated in the instructions. Decal film seems to be quite thin and is very glossy - matt varnish is necessary to remove this sheen.
First inspection of parts on sprues reveals that there is no flash to be seen, most ejector pin marks are located outside visible areas of the model and I was able to find just one small sink hole - in the middle of the rearview mirror. The details on all parts are quite sharp and overall impression of the kit quality is very good.
The only sink mark I've found - it cannot be ignored and will have to be filled.
One thing is immediately obvious and has to be clearly said - this model is not a copy of old Tamiya M151A2 kits! Older M151 models from Academy were direct copies of the Tamiya kits indeed, but this one is a completely new molding.
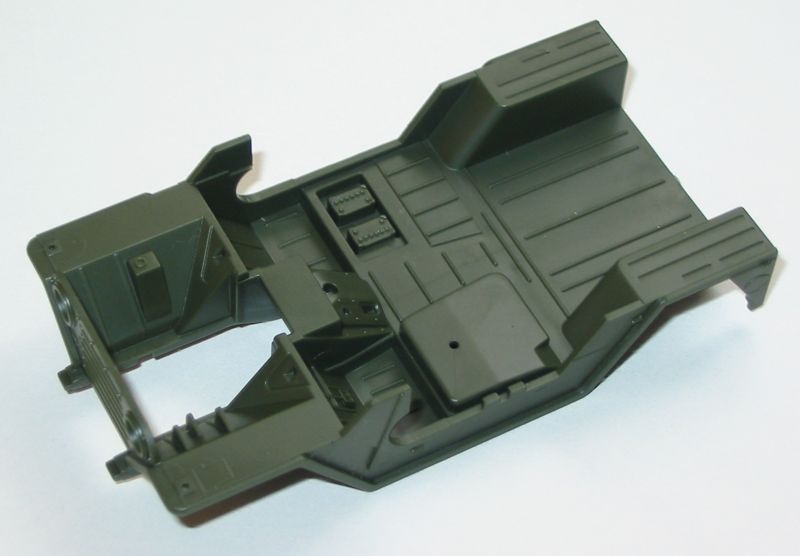
The body of the truck is one piece - just as in the prototype.
There are two batteries under the passenger seat - nice touch!.
Click on photo to see enlarged version.
The chassis/body of the truck is one part, just as in the real vehicle. It has the battery compartment under the passenger seat and two batteries are molded on - the feature missing from old Tamiya kits. Of course these batteries will not be visible once you install the cover and a passenger seat, but it is good to have them there in case someone wants to build a "maintenance scene" - particularly tempting idea as there is a complete engine present in the kit - more about it later. One noticeable problem with the main body part is the shape of the rear fenders, just behind the rear wheels. The shape of the part in the model is correct only for M151A2 trucks, that have lifting eyes mounted there. The shape of this part in M151A1 trucks is simpler, more triangular, without the rectangular section at the bottom. It is very easy to correct this flaw - two cuts with sharp blade will remove the superfluous pieces of plastic. The other problem is the number of pedals molded on the floor - they don't look bad, but there are only two of them. M151 has a manual transmission and this means three pedals - the gas pedal is missing from the kit! This pedal is however extremely simple in shape in reality - it is just a bent metal rod, so it should be easy to scratch built.
 |
 |
| The
shape of the rear fender is incorrect for the M151A1 version. |
The correct shape of this part in M151A1 truck. |
Wheels of the vehicle are very nicely molded and they have full lightening holes, not just shallow indents as Tamiya kits had. Tires are made of soft vinyl, and have correct tread pattern. There is a manufacturer name molded on the sides of tires, although - probably for copyright reasons - it is "Hooper Cross Country" instead of correct "Cooper...".
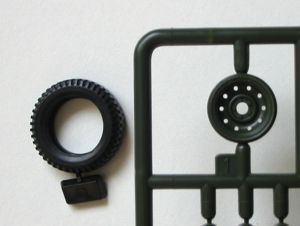
The wheel and tire.
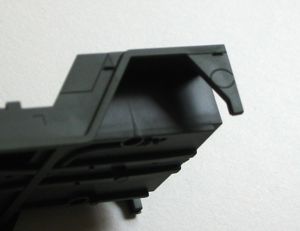
The suspension is nicely reproduced with most important parts present, but unfortunately the rear suspension is M151A2 style, with the trailing arm instead of correct swinging A-frame. Of course it will not be noticeable in the finished model, unless you take a look at it from beneath, but for those who want their model to be more accurate, some scratch building is necessary. Front suspension is a bit too simplified to my taste with some parts, visible even on box top art, omitted. Also all components of steering mechanism are missing.
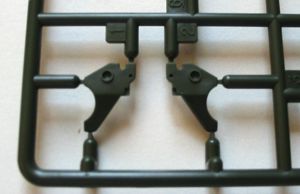
These rear suspension parts are good
only for M151A2
variant of the truck, not for the M151A1.
Unlike the old Tamiya kit, this new Academy model has a complete engine. It is composed of 15 parts and it seems to be a very good representation of the real thing - all you need to add is the wiring and some pipework. There is a few more parts supplied to make the engine compartment look busy: radiator, air filter, horn and others. Bottom of the engine hood is detailed with all the stiffeners present there on the prototype, so it can be easily installed in the open position - there is even a small decal for data placard supplied.
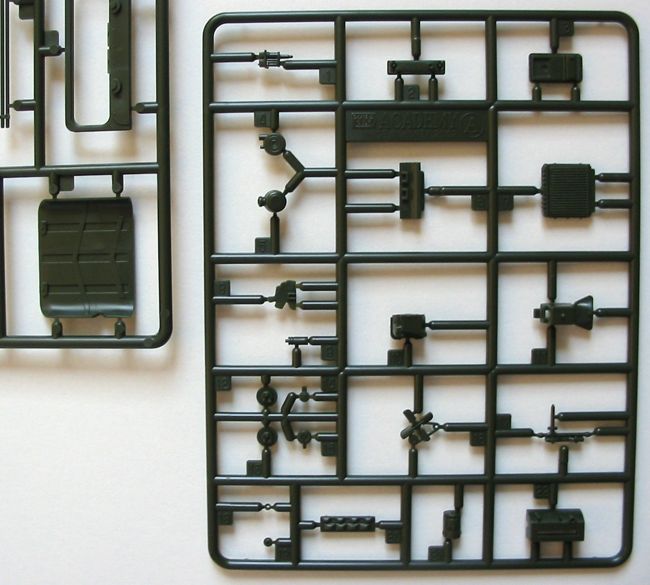
The engine is composed of
15 parts. On the same sprue are
other parts to clutter the engine compartment. On the left you can see
the bottom of the engine hood.
Click on photo to see enlarged version.
The interior of the truck is reasonably detailed - all the levers are in place, although, as mentioned earlier, the gas pedal is missing. Parking brake lever is in engaged position (vertical), so those of you planning to put this model in a "dynamic" situation on a diorama, should modify this part. Steering wheel is however incorrect for M151A1 truck - it looks more like dished wheel of M151A2 trucks. Older A1 trucks had almost flat wheel with thin metal spokes.
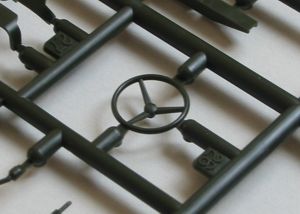
Steering wheel looks more
like M151A2 version than A1 one.
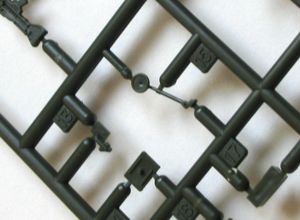
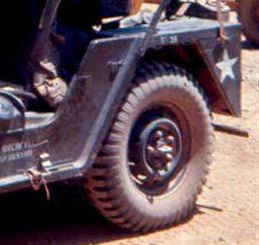
The wipers motors are correct pneumatic type, but they are both positioned the same way, while in real vehicle the left one should be upside down - wipers in the M151A1 truck rotate in opposite directions, and to achieve this, one motor was simply rotated 180 degrees.
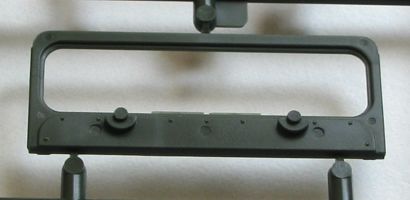
Both wiper motors are molded the same way,
while in fact left one should be upside down.
There are some ejector pin marks visible here, but they should be easy to fill.
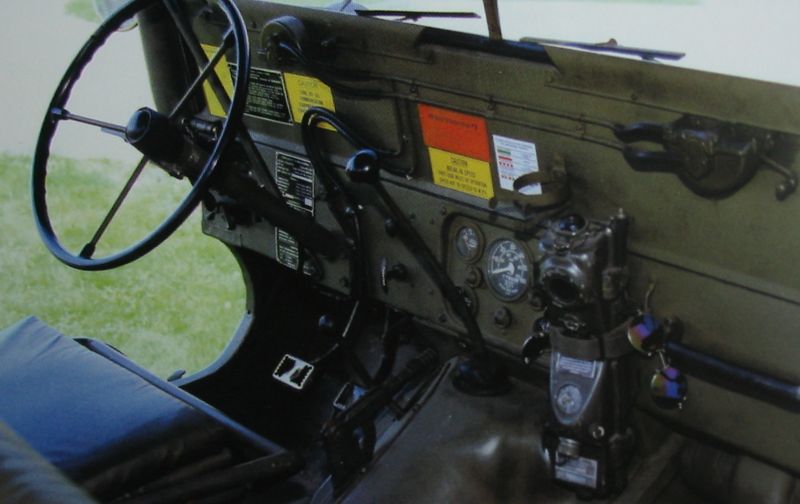
On this photo of the real M151A1 you can see the shape of the steering wheel
and the "inverted" left wiper motor.
Click on the photo for enlarged version.
This photo was scanned
from WWP book - see references at the bottom of this review.
RT-524 radio is well molded and is quite accurate, with all the knobs in right places. All that is needed to bring it to life are some cables and skillful painting.
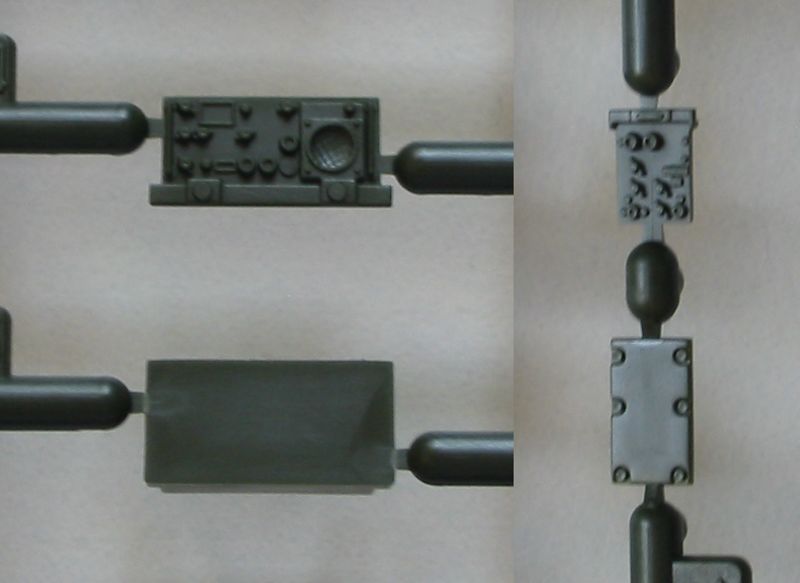
The radio transmitter/receiver.
Click on photo to see enlarged version.
The M60 machine gun mount is well done, but the gun itself could be a bit better. It is not bad and is quite useable, but I will use Dragon replacement, which is more refined, in my model.
There are parts for the bow assembly for the canvas cover in folded position present in the kit. If you install the machine gun you can omit these parts - they were usually left aside when the gun was in place, as it is not possible to close the top cover without removing the gun mount anyway. It is a pity that full canvas cover and rear seat was not included, but it is possible that we will find these parts in the future kit version. Probably in a version with a trailer - just as it was with old Tamiya kit. Even in vehicles where no rear seat was present, some improvised seat was added on the left rear fender. No such part is in the kit, so some scratch building is necessary if you want to add one.
I already mentioned earlier that clear parts are provided for turn signal lights, reflectors and marker lights. You also get opaque green styrene parts for turn signal and marker lights. Academy instructions suggest using the green parts and indicate clear parts as "unused", but I would suggest using the clear parts. With some skillful painting with clear orange and red paints on the outside and some silver paint on the back, it should be possible to get much more convincing results, than with the opaque parts. If you want to build the Nam era truck from the kit, don't use the marker lights. You can install two reflectors on rear fender sides but they are optional - many vehicles didn't have them mounted. Academy shows all marker lights parts (both clear and opaque green) as unused, but for later era vehicles you should use marker lights on front and rear fenders (instead of reflectors).
To sum up, the Academy kit is a very nice little thing. There are some small accuracy problems, but most are very easy to correct and others would not be noticeable to anyone, but MUTT-fanatics. We can now hope that Academy will follow this kit with a new molding for M151A2 version - the old one shows its age now and it should be very easy to modify parts in this kit to represent the newer truck variant. Particularly that so many details are already more accurate for A2 than A1 version :-) Right now we have three versions of the kit available from Academy: basic M151A1 described here, M151A1C with recoilless gun and Israeli Shmira truck (however it is not clear if IDF used any A1 trucks - it is likely that all Shmiras were actually based on M151A2 variant). As mentioned earlier in the article, the version with a trailer will probably follow soon.
UPDATE (2004.03.01): As was easy to predict, Academy recently released a new kit of M151A2 variant! And it came with the trailer. The new kit contains parts to build hardtop variant of the truck and also there is "doghouse" roof for the trailer included - this configuration was commonly used by USAREUR in 1980's. Review of this new kit soon!
There is a photoetched update set available for this model from Eduard. I
haven't seen it "in the flesh" yet, but judging from the photos on the
Eduard web page it improves this cute little model even more. UPDATE:
I bought Eduard set and indeed it is well worth its price!
UPDATE: There was a discussion on Armorama Armor Talk forum about the wheels in the Academy model (with vinyl tires) and how they compare to wheels in old Tamiya kit of M151A2 (plastic tires molded with rims). Here are my findings:
Academy
tires are about 1 mm smaller in diameter. I know that Tamiya wheels didn't fit
well under the rear fender, so maybe Academy wheels are more correct size. I
tried to take some measurements from photos and I think that indeed Academy
wheel's size is closer to reality.
Academy tires are more sharp-edged in section (the part of tire that touches the
ground is more flat), while Tamiya are much more rounded in section. The real
tires are much more sharp-edged than Tamiya, but probably a bit more rounded
than Academy... doh... Tamiya tires can be flattened with a file or sandpaper -
it would correct their size at the same time, but tread pattern can be lost.
Academy tires are vinyl so modifying their shape is almost impossible (It may be
possible if they are frozen - I never tried it myself).
On Tamiya tires there is "Firestone" embossing and on Academy there is
"Hooper Cross Country" - correctly it should be "Cooper Cross
Country". I don't know if Firestone tires were ever used (it is however
quite possible as Ford was selling most of their cars with Firestones), but Cooper's
definitely were.
Tread pattern is slightly more accurate on Tamiya tires, but Academy ones are
very close.
Honestly I don't see a point in replacing Academy tires with Tamiya ones. It
would be a lot of work, unless someone wants to replace the whole wheels and
even this would require some surgery to axles. But then you also need to consider
the accuracy of rims. Tamiya rims have a bit more accurate profile, but they
don't have the lightening holes in them, just indentations. Academy wheels have
full holes and this makes them look better.
But of course if someone hates vinyl tires, replacing them with plastic ones
from Tamiya may be his way to happiness...
References:
- "Ford MUTT in detail - M151 A1/A2 the New Ford's Utility Truck"
Photo Manual for Modelers, Present Vehicle Line 2, Wings
& Wheels Publications (WWP)
-
"1/4 ton M151 MUTT"
Warmachines No 14, Military Photo File, Verlinden
Publications
- various Internet sites.
![]()
![]()
Copyright © 2003, 2004 VODNIK, mailto:pawel@vodnik.net