|
|
|
|
Superdetailing
the M923A1
truck
PART 2
STEP 4
In this step you attach the rear axles to the frame. Make sure everything is
perfectly aligned, so that all wheels will have contact with the ground later.
Leaf springs again have some difficult to remove sink holes on them. Once again
you will need to modify the length of drive shaft (31A). This time it is a bit
too short, so replace the center section with a longer piece of styrene rod.
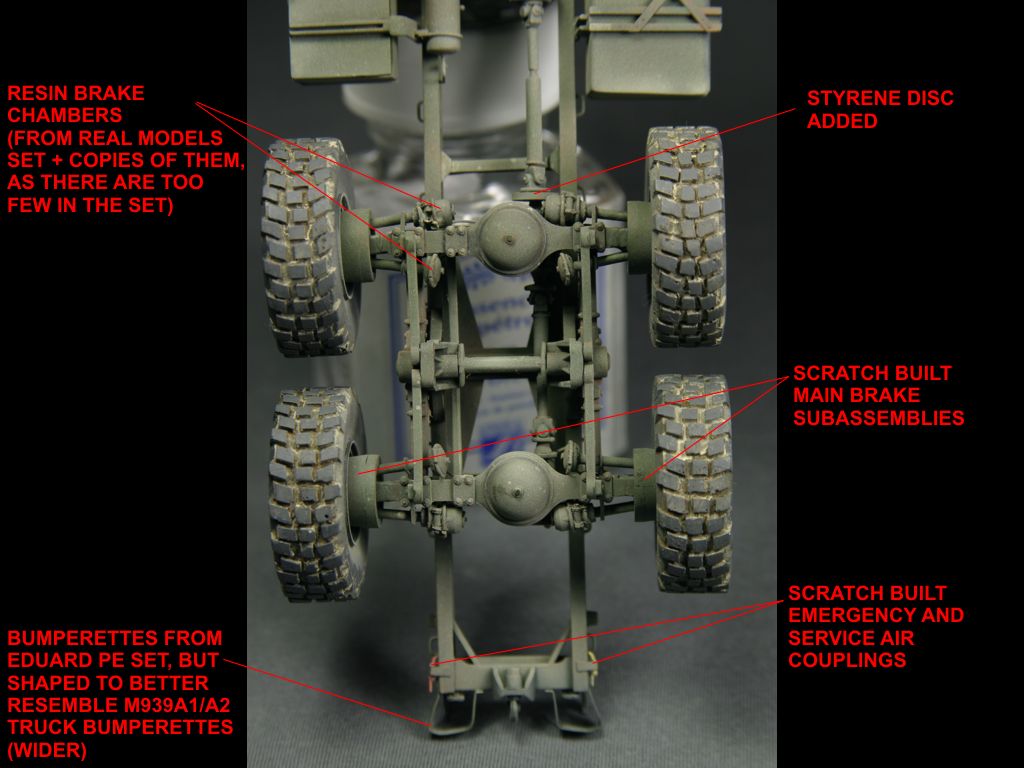
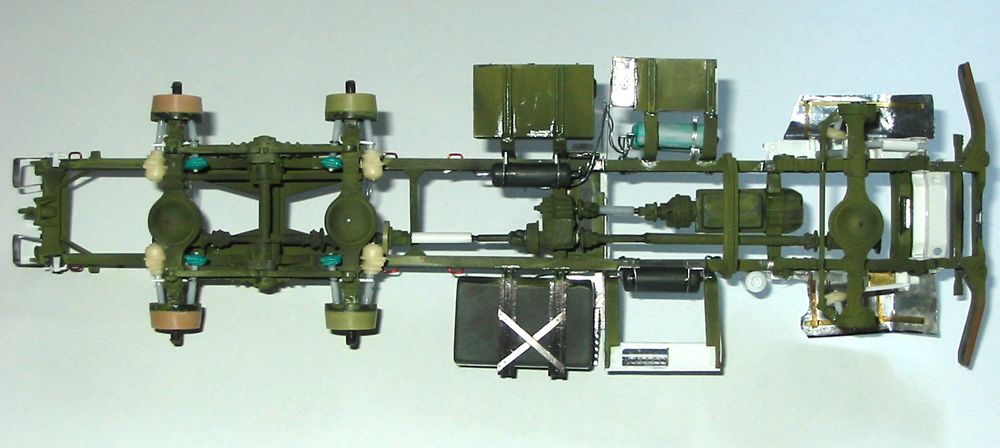
Italeri missed a brake chambers that should be attached to both axles. There
should be four chambers attached to each axle - two smaller and two bigger ones
(see photos). I used resin parts from Real Model set (I had to make my own
copies of small chambers as there were too few in the set). I added some air
hoses using solder wire.
Italeri forgot to include the main brake subassemblies of all four rear wheels -
this makes the track of the rear wheels narrower than the track of front wheels!
It is easy fix - I used 3mm wide slices cut from some old Tamiya sprocket wheels
I've found in my spare parts box (probably form M60 kits) and attached them to
both rear axles. If you are building the A0 version of the truck (e.g. M925
Shelter Truck kit) you do not need to add these parts as there are dual wheels
on rear axles and they fit correctly without modifications.
|
|
|
STEP 5
I used many parts from Eduard PE set in this step. I strongly suggest using it
as it is a great improvement over kit parts. See Eduard set instructions to find
out all the changes that can be done.
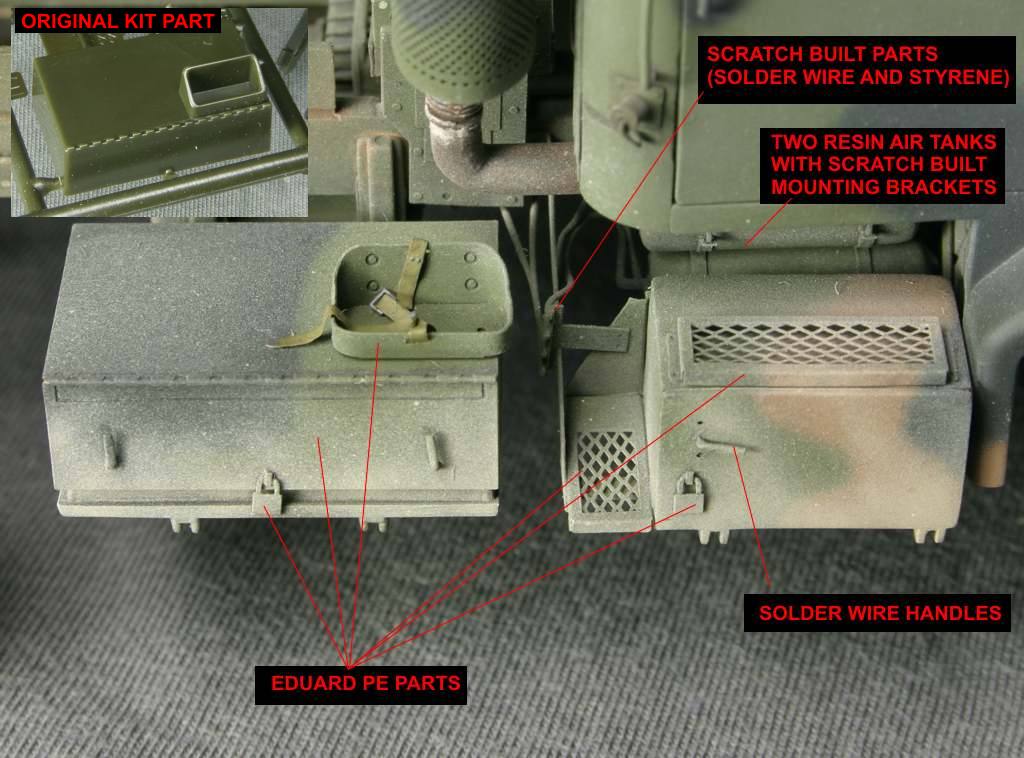
I decided not to use part 43A and also removed a piece of part 42A and scratch
built my own step and "box" from styrene and PE parts.
I did not use air tank part 38A - instead I used two resin tanks (Italeri missed
to include one) from Real Model set and scratch built mounting brackets.
|
|
|
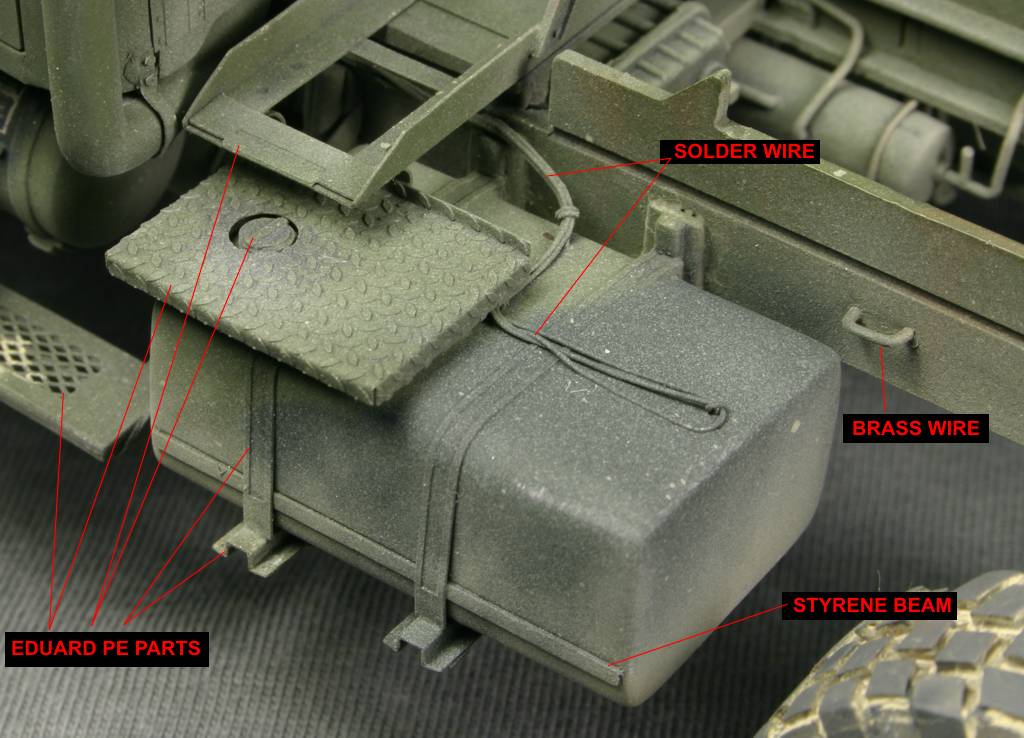
STEP 6
Sub-step G - fuel tank. I replaced mounting bands and the step with PE parts and also added some vent lines from thin solder wire.
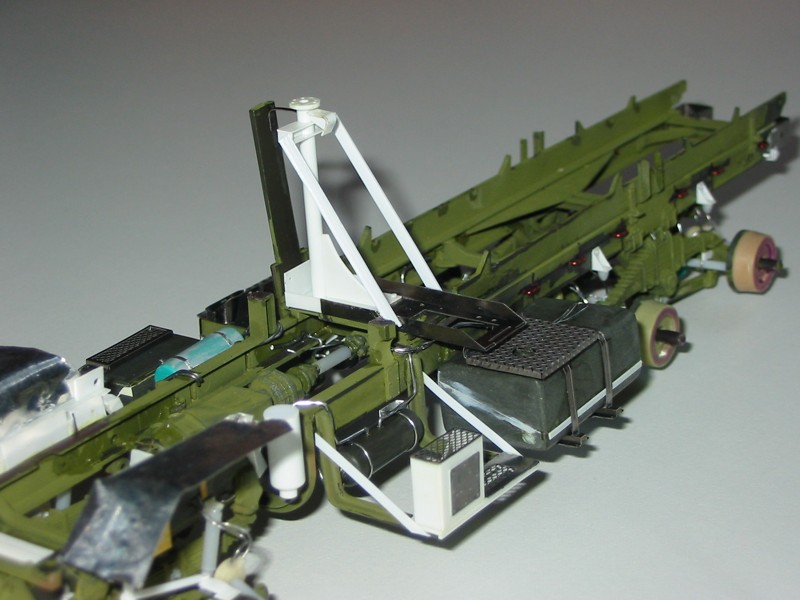
Sub-step K - exhaust/spare wheel carrier. The whole spare
wheel carrier is incorrect for the M923A1 version of the truck (see the kit
review >here<
for more details). I used some parts from Eduard PE set and then scratch built
the correct spare wheel carrier using styrene sheets and rods, although I didn't
make the upper half of it, as the original truck I was building didn't have it
installed. I also didn't attach part 50B for the same reason.
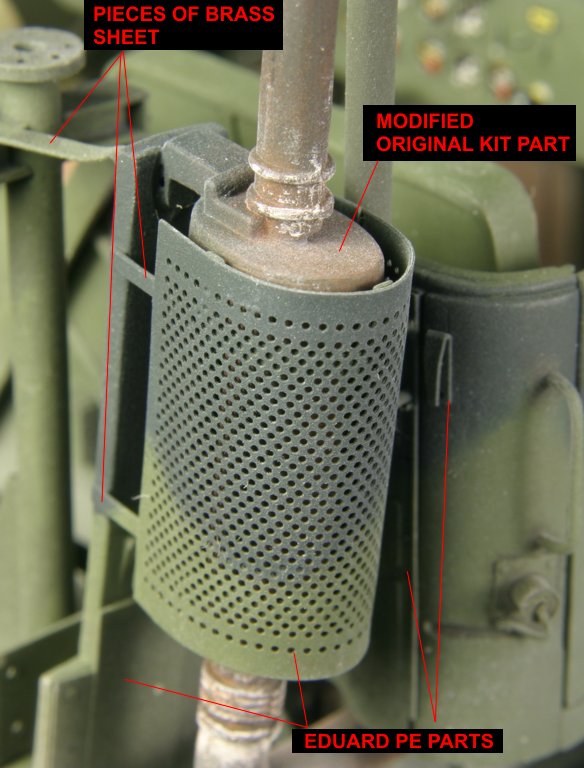
I improved the look of exhaust muffler with PE shield from
Eduard set.
|
|
|
I replaced rear bumperettes with Eduard PE parts, but changed
their shape as both Italeri and Eduard made them correct for A0 version of the
truck (e.g. M925), but they should be wider for A1 and A2 truck variants.
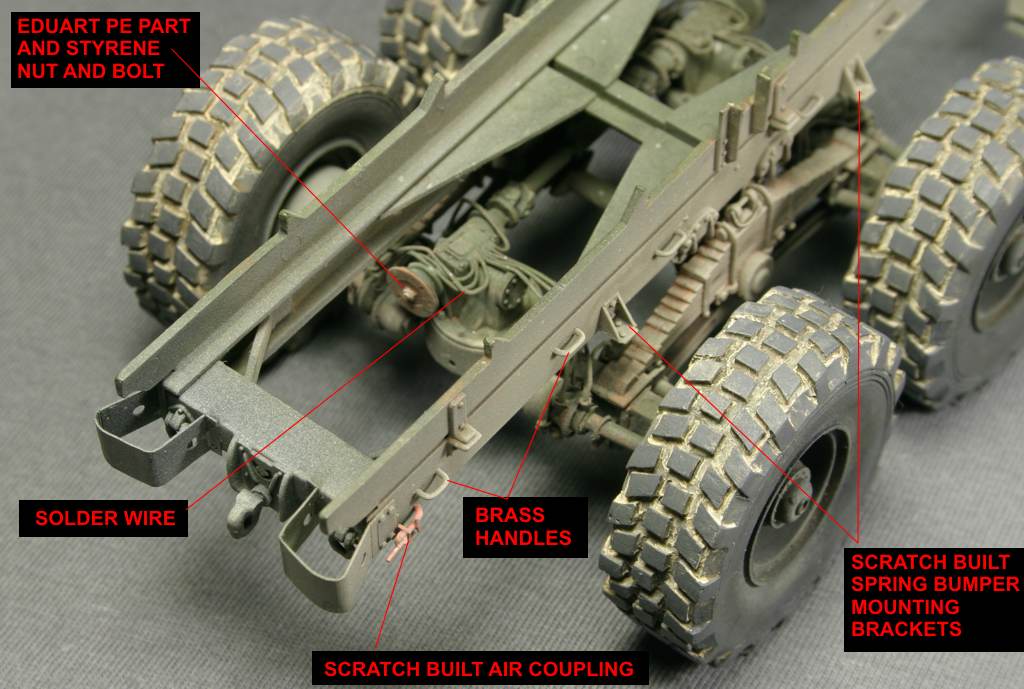
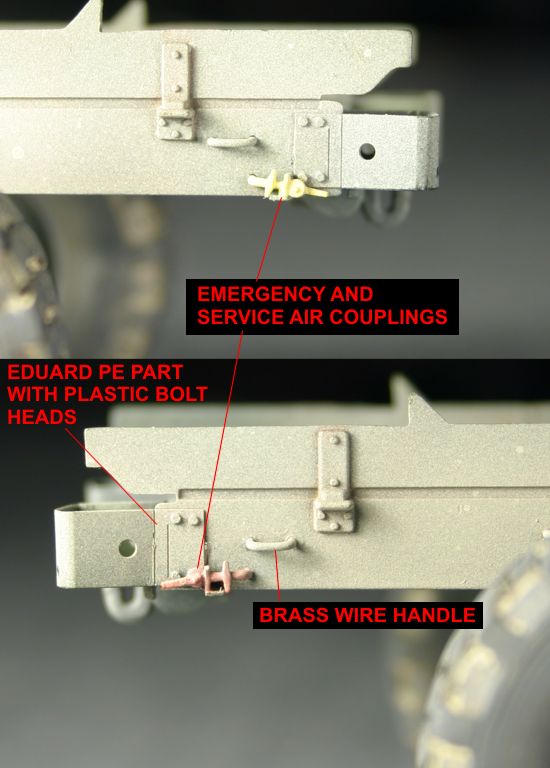
Before I installed the wheels, I added some more scratch built details to the
suspension frame:
- emergency and service air couplings,
- small spring bumpers and their mounting
brackets,
- additional air tank near the transfer
case,
- various air hoses from solder wire,
- additional diagonal support beams to
parts 42A and 37B.
I also attached the air tank 24A using scratch built support brackets to part
42A.
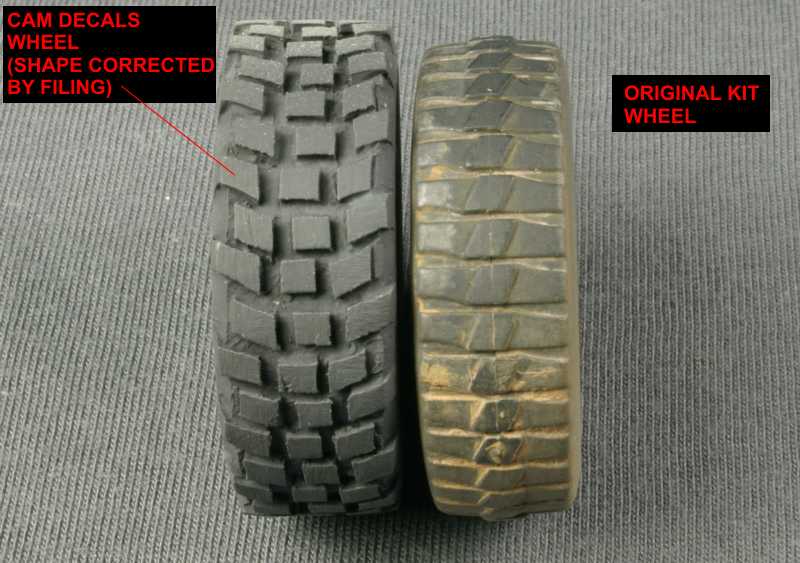
I used resin CAM wheels instead of kit ones (see review >here<).
|
|
|
|
|
|
|
|
|
Copyright © 2003 VODNIK, mailto:pawel@vodnik.net