|
|
|
|
Superdetailing
the M923A1
truck
PART 3
STEP 7
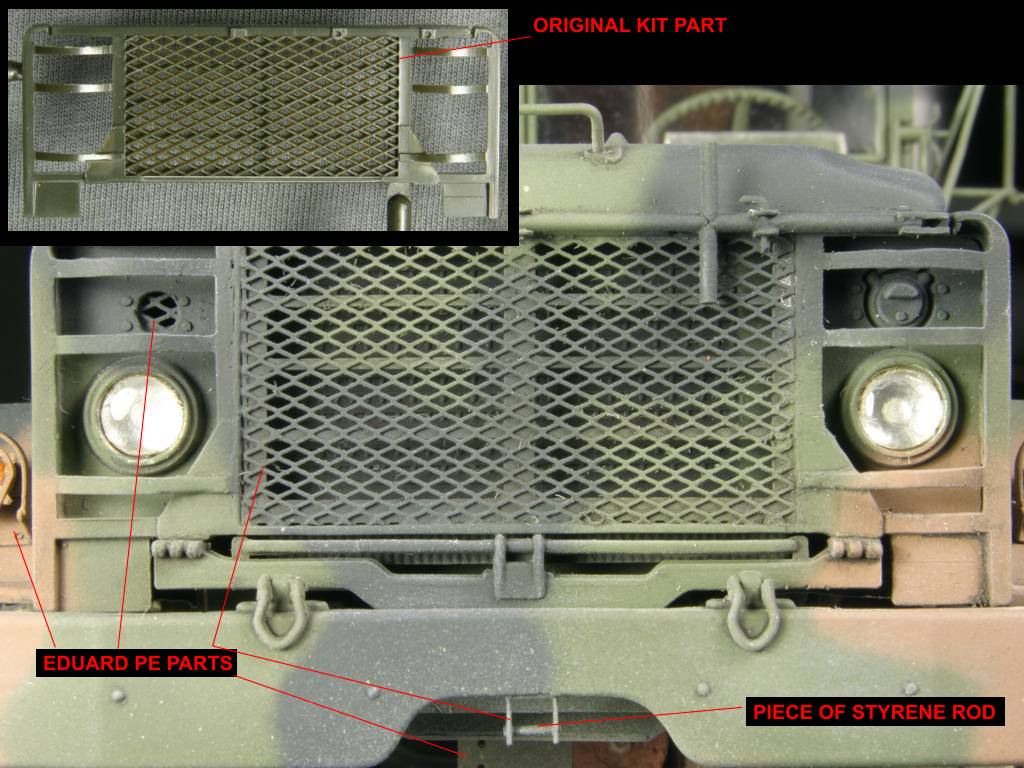
Sub-step Y: I used PE mesh from Eduard set and scratch built the new hood support (part 67A). I added the PE radiator behind the mesh.
|
|
|
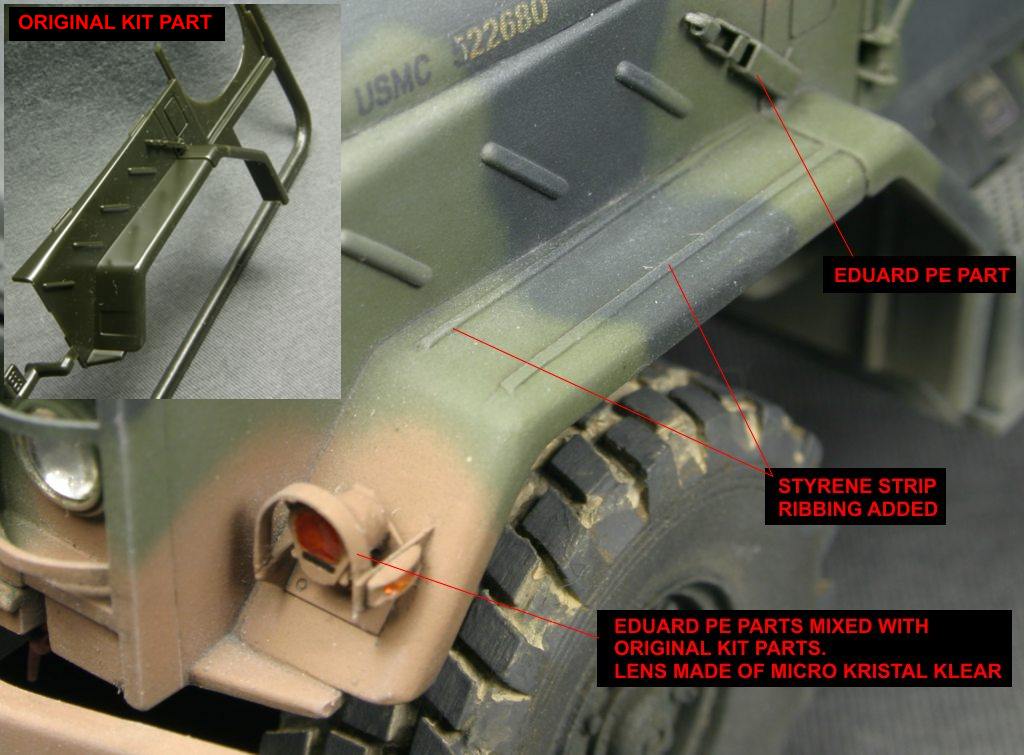
- parts 70A and 68A - I added ribs from styrene rods to both
fenders and filled the indentations for turn lights, as I used Eduard PE parts
instead of 77A parts. I only used plastic bodies of kit turn lamps, with PE
front attached and lens made from Microscale Kristal Klear. I used parts 78B and
79B, as Eduard PE parts were not correctly shaped. I replaced plastic hood
clamps with PE parts. I did not drill the holes as suggested in instructions as
I scratch built my own mirror frames.
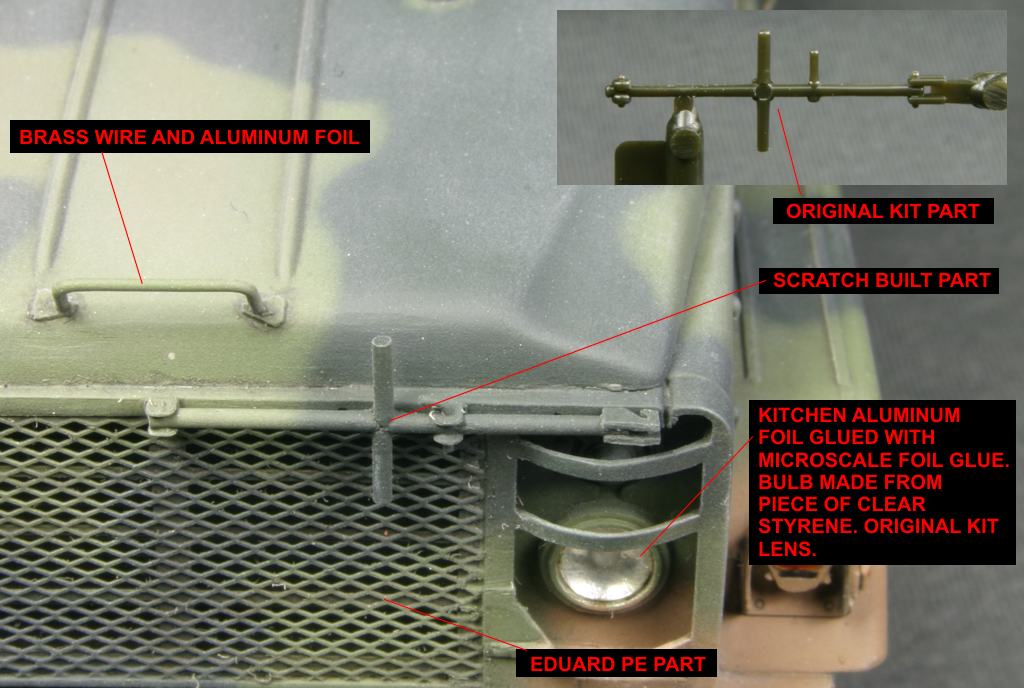
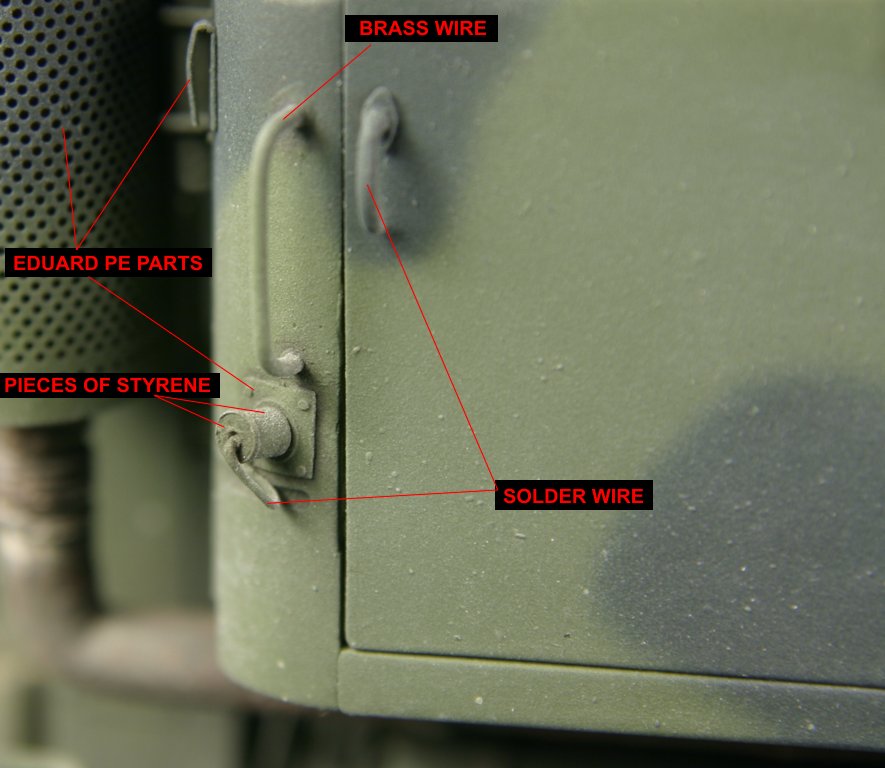
- hood 71A - Instead of part 76B I used brass wire. I removed molded on windshield fasteners and support brackets and replaced them with PE parts.
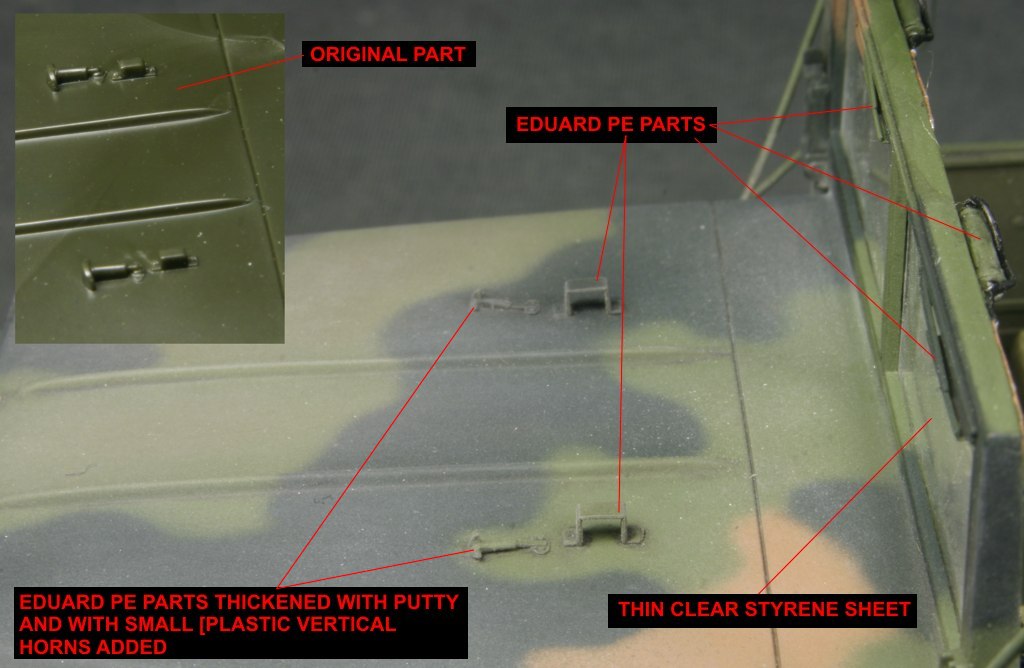
- windshield 72A - I replaced wipers with PE parts. Instead
of transparent part 73D I used the 0.005" clear styrene sheet for the glass
and scratch built the new internal framing. Then I attached various PE parts to
it and some solder wire pipes.
- part 69A - I removed some molded on detail and replaced it
with Eduard PE parts. I also added some internal structure inside from
rectangular styrene rods.
|
|
|
I did not attach canvas cover 75A on my truck.
STEP 8
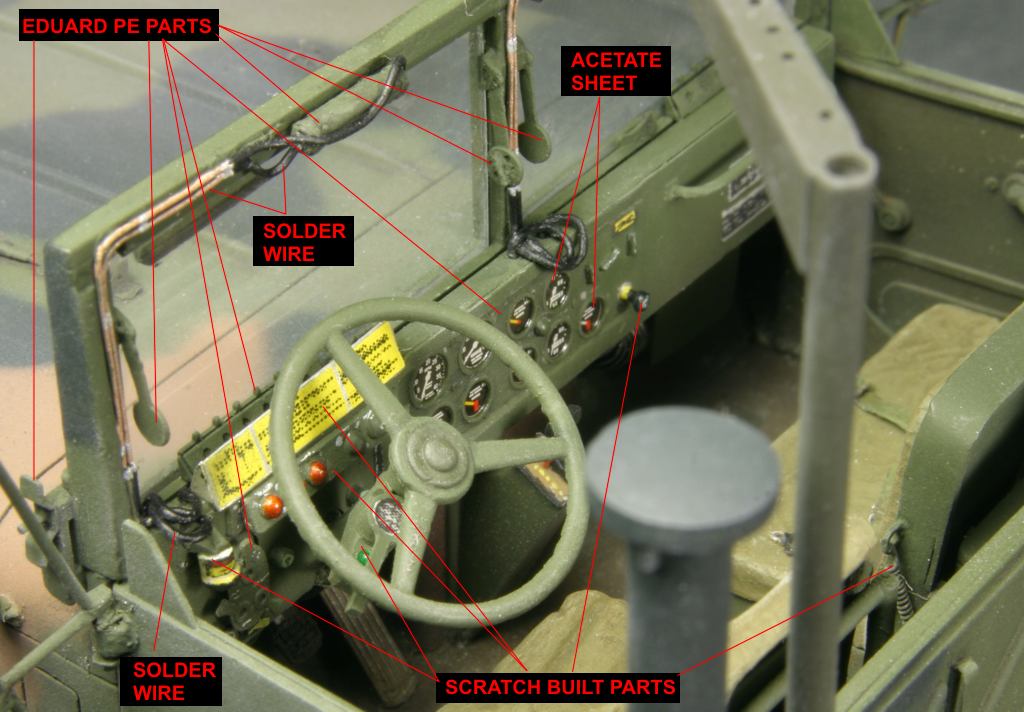
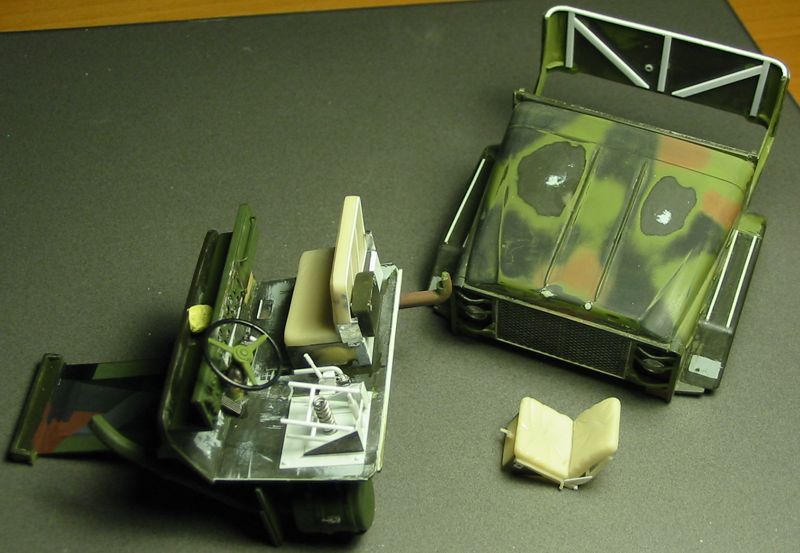
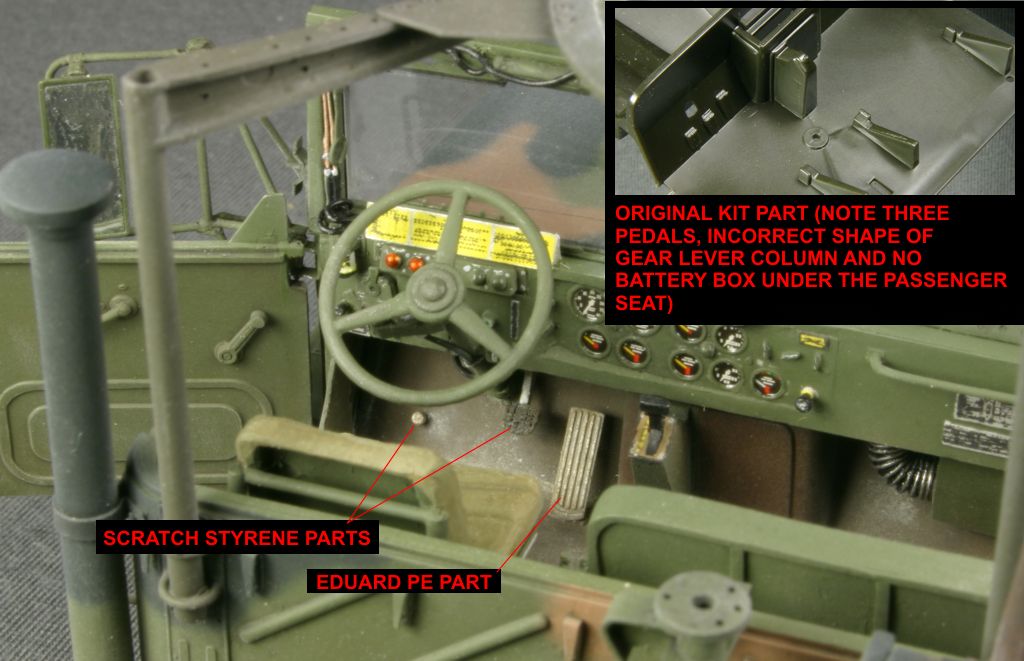
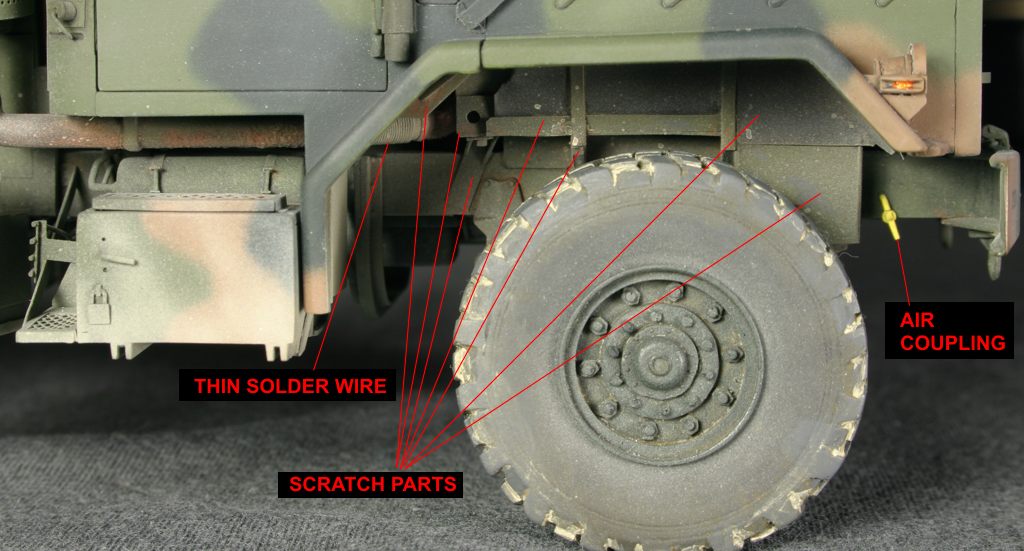
This step is very easy in Italeri instructions, but it was the most complex part of construction of my model. First I had to heavily modify the shape of the part 79A. I completely removed the splash guards above wheels and replaced them with new properly shaped splash guards made from aluminum foil with brass support structure - I attached it to the suspension frame, not to the cab floor. I removed the supports for seats from the floor. I filled and sanded smooth the hole for part 80A as it should not be there at all. I removed the molded on pedals and installed PE accelerator pedal and scratch built brake pedal. I modified the shape of gear lever column (see photo) and also improved the look of the lever itself using PE part and styrene.
|
|
|
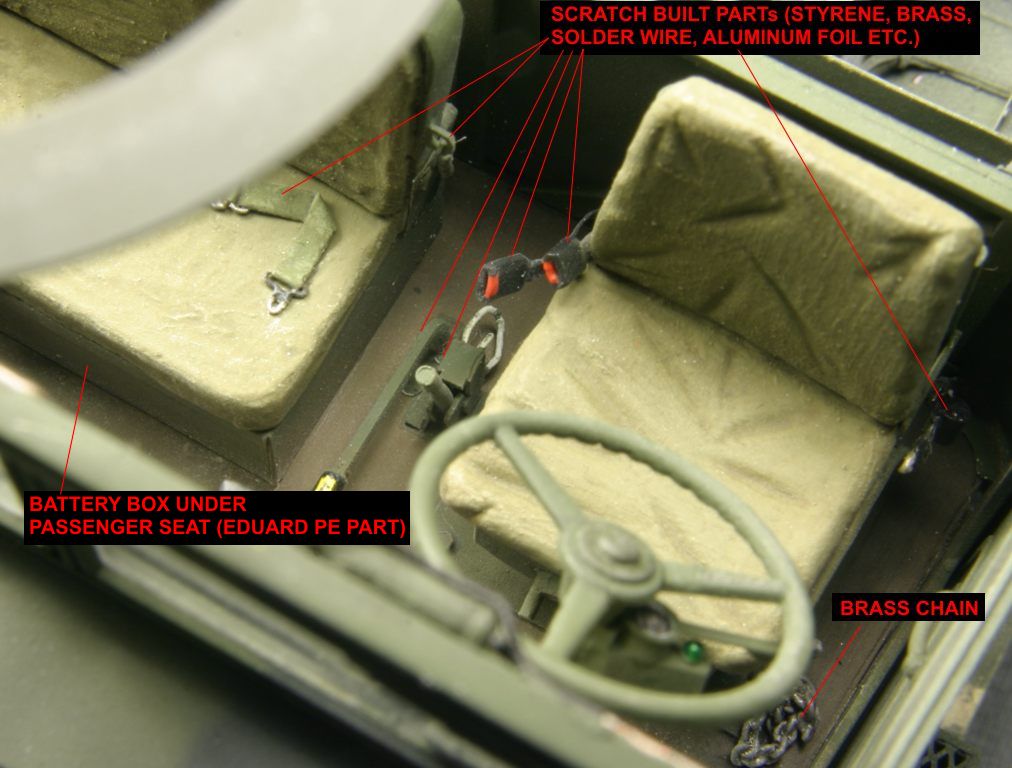
I scratch built the support structure for driver's seat using the styrene rods, some parts from Eduard PE set and resin Real Model set. The seat itself is Real Model's resin piece. The passenger seat is also Real Model part and it is attached to the battery box from Eduard PE set. I added some details on the back and sides of the passenger seat and added seatbelts (aluminum foil, wire, styrene) to both seats.
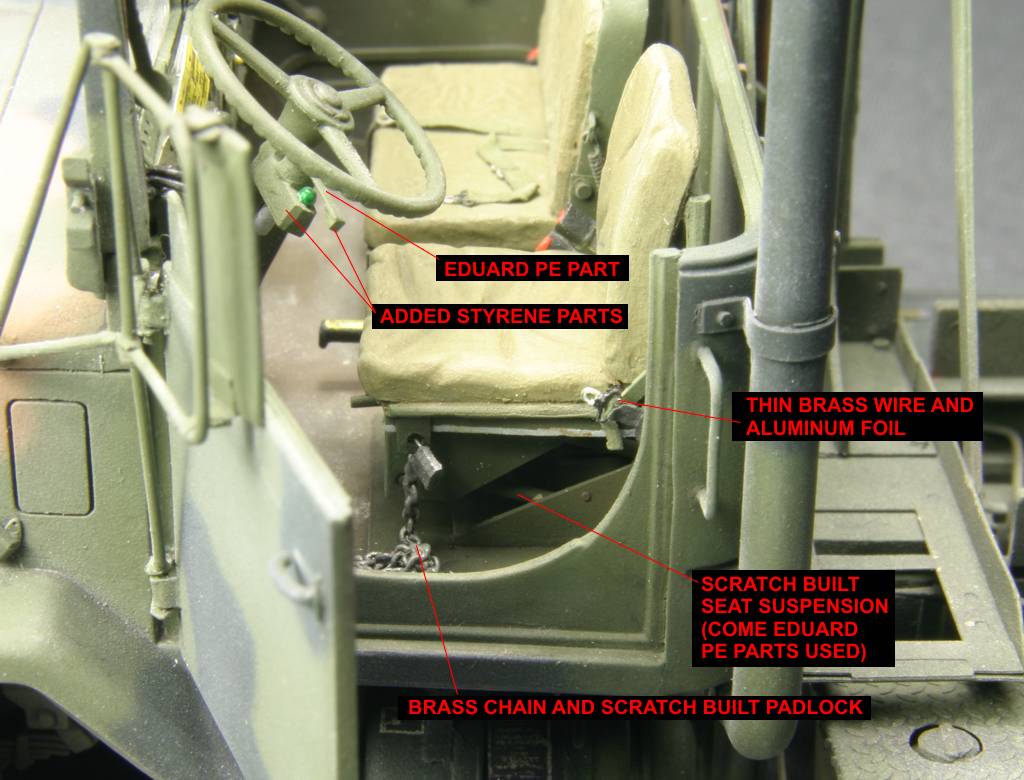
I added scratch built levers (transmission selector and parking brake) on the cab floor - I used a handle from 81A part.
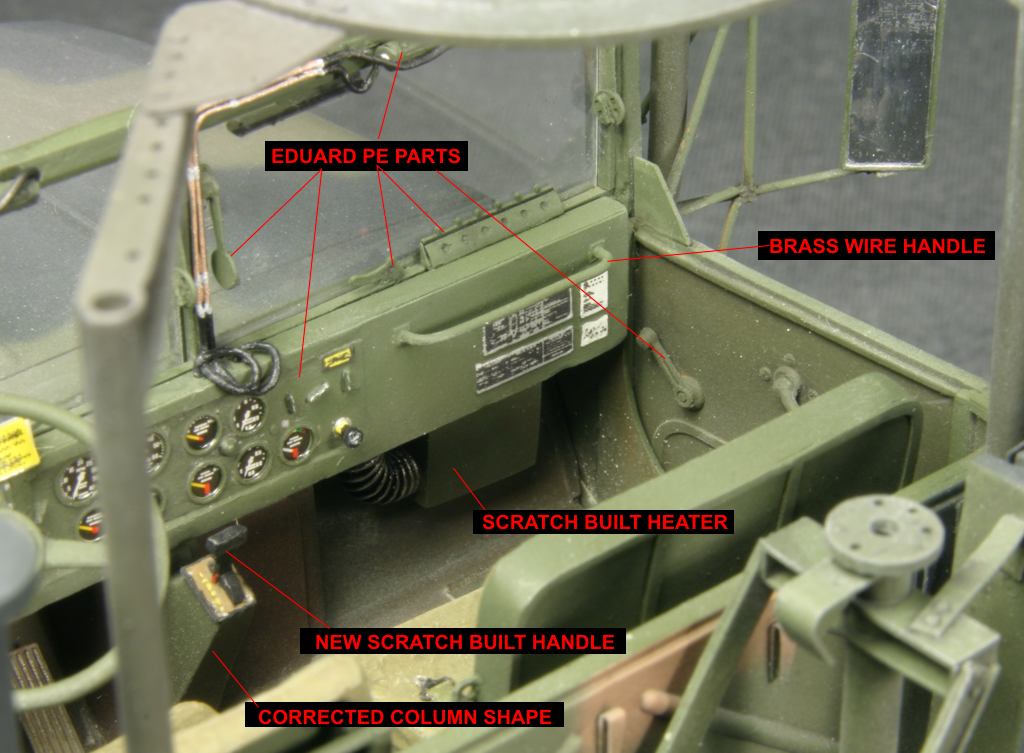
I used Eduard PE dashboard with acetate backing and also added some scratch styrene details and brass wire handle to it. Under the dashboard I installed the scratch built heater. On the steering wheel column I added the scratch styrene turn light switch box with indicator and lever (PE part).
I improved the look of the exhaust pipe 88B with thin solder wire wrapped around it (visible on >this photo<). I filled the air filter with Milliput to restore the full shape and replaced the mounting brackets with PE and aluminum foil parts.

![]()
![]()
![]()
Copyright © 2003 VODNIK, mailto:pawel@vodnik.net