![]()
Building Academy MiG-29A Fulcrum
kit No. 2116
1/48
If you haven't read my review of Academy model yet, please do so now. I will base on this review throughout this article. The review is in the "Reviews" section - you can also click here to see it.
I started to build this model several years ago. Actually I can't recall when it exactly was, but I think it could be six or even more years ago. Back then I though that it is a great kit. It had fine engraved panel lines, some nice details etc.. I've bought Eduard's photoetched detail set (no longer available in its full version) and Verlinden's resin K-36 ejection seat. Using this seat and some etched brass form Eduard set and with some careful painting I've built a reasonably looking cockpit. I assembled the whole fuselage, wings, horizontal and vertical stabilizers. From big components only engine intakes were not attached as I wanted to paint main gear wells first. I replaced some panels on the surface of the model with photo etched parts from Eduard set. At this point the construction ceased.
My MiG-29A was supposed to be a replica of one of airplanes used by Polish 1st Fighter Regiment (1PLM) "Warszawa" in Minsk Mazowiecki. Back then I was not able to get decent reference materials and I had problems with matching paints, so I decided to put this model aside for a moment. A moment appeared to be much longer then I expected. For first few years I was too busy building my favorite 1/35 armor models to finish this airplane. Then for the next three years or so I took a general break from the modeling hobby.
In September 2002 I decided to get back to modeling and I thought that finishing this long overdue project is a good start. It appeared however that my own standards have changed since the beginning of this kit's construction and what earlier seemed well done, now was not acceptable anymore. So I started by taking apart almost all parts that were previously assembled. Of course some minor damage occurred in the process as Revell's Contacta cement I used was not willing to give up easily. One unpleasant surprise was waiting for me inside the nose of the plane. I discovered that the compound (I'm not sure now what it was...) I used to firmly attach metal weight to the plastic (to prevent model from tail sitting) has partially melted the plastic from the inside. I had to carefully scrape the soft melted plastic off the parts leaving only the undamaged material. In some places parts were reduced to less then one fourth of their original thickness. I reinforced all affected parts with gap filling superglue.
Initially I thought that I will leave previously finished cockpit untouched, but after seeing Aires resin set I knew I have to use it. While browsing the web for other aftermarket parts for MiG-29 I've found photoetched exhaust nozzles from Part. After a short trip to two hobby shops in Warsaw I had both mentioned sets ready for installation in my MiG. I disassembled the old cockpit and now I basically could start the construction from the beginning once again.
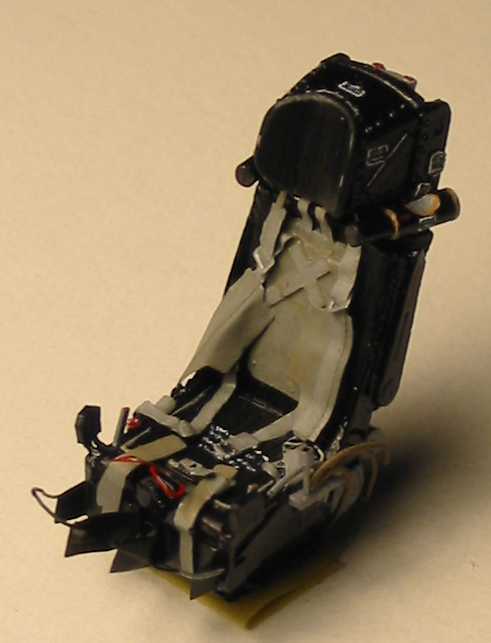
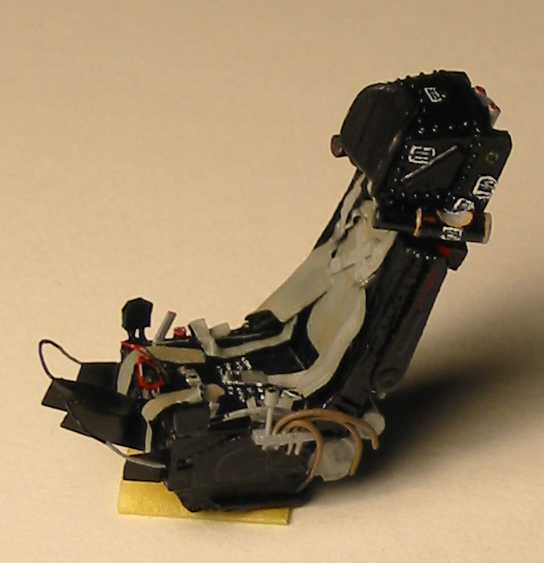
As usual I started to "reassemble" my model with the cockpit area. But first step was to replace two of the panel with gun cooling vents with photoetched parts. I used one part from Eduard PE set and one from Aires cockpit set. After installing these panes I attached the covers for the auxiliary air intakes - I used the parts to make them in closed position. With all these parts in place I could start building the cockpit. As I mentioned in the kit's review the original cockpit of the kit is not of much use. I've chosen the great Aires resin & photoetched MiG-29A cockpit set to replace kit's parts. It includes very well done K-36 ejection seat. It is much better then the Verlinden's K-36 seat that I initially planned to use in this model. The Aires set allows for opening of two panels under the cockpit and showing some avionics black boxes, but I decided to leave them closed. Below are two pictures of K-36 seat before installation in the cockpit. The harness, ejection handles and parts of leg restrains are from photoetched sheet included in Aires set. Other details added are from pieces of sheet styrene and thin wires. Humbrol gloss black paint was used for the seat base and headrest, Humbrol semi-gloss (85) was used to paint cushions. Harness was painted with a mixture of Humbrol colors based on linen color (72). Darker wash was applied to harness, it was also drybrushed with lighter shades. All placards were hand painted.
|
|
|
K-36
ejection seat from resin Aires MiG-29 cockpit set.
Click on photos for enlarged version.
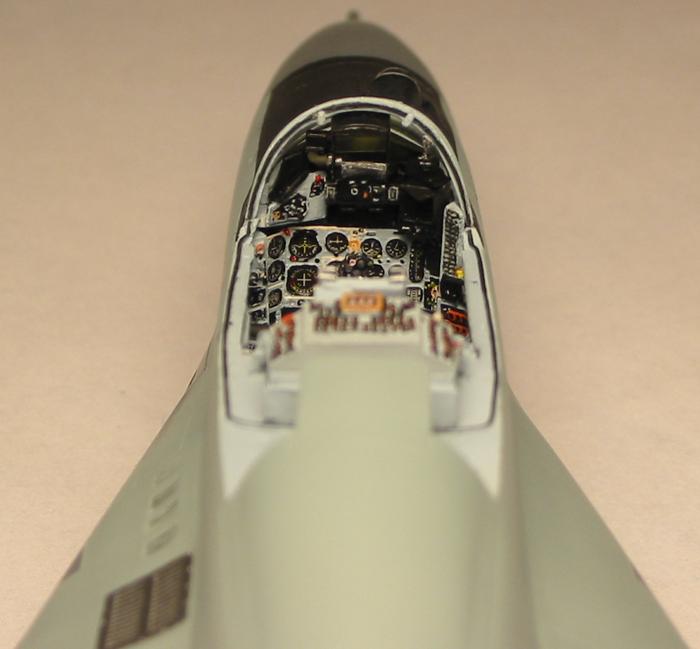
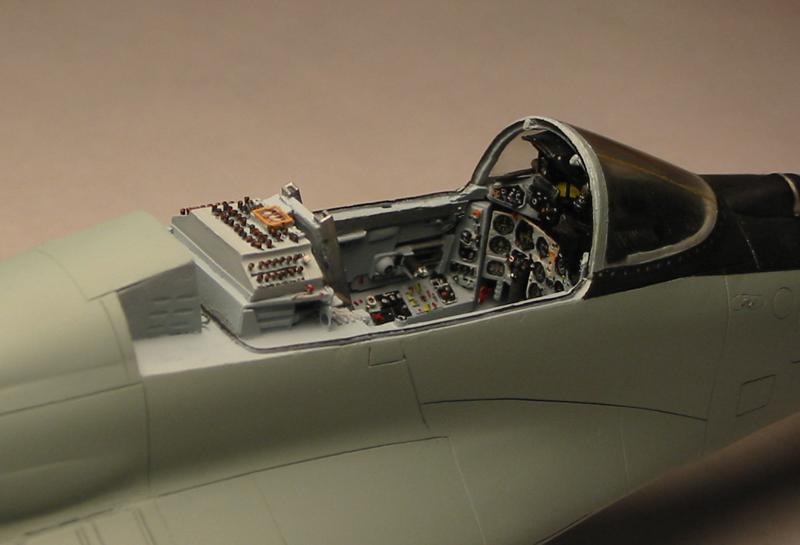
Below are pictures of the finished Aires resin cockpit installed in the model. Only the ejection seat is missing that was left aside to be installed in the finished model. The cockpit resin tub fit was quite good and I didn't have to trim it much. Photoetched instrument panel was a bit more difficult to install - I had to cut off narrow strips of metal at the two lines where the panel is bent, to make it narrower. Some details from old Eduard PE set are also used, and also some scratch built parts (e.g. sealer line around the cockpit made from 0.01" square profile styrene rod). Cockpit is painted with the mixture of several Model Master enamel paints to get the gray color with the light bluish tint (light ghost gray 1728 + white 1768 + bright blue 2032). No washes or drybrushing was used, just some precise painting with various colors. Three kinds of Humbrol black enamels (gloss, semi-gloss and matt) were used to paint various details.
I attached the windshield using the transparent epoxy glue. The greenish tint of the windshield was achieved by applying mixture of Future floor polish and Tamiya clear green paint on it with Q-tip.
 |
|
Aires
resin cockpit installed in the model. No ejection seat yet. |
|
|
 |
 |
|
Collection
of cockpit pictures. |
||
With the cockpit in place I decided to glue all remaining parts of nose fuselage section together. One more detail required extra work here - I drilled through the gun muzzle and air vents and installed a few pieces of styrene behind, to build a part of gun compartment. I also added a gun barrel from the piece of styrene rod.
Now it was time to glue together all four parts that make this fuselage section. A lot of filling and sanding was needed, but only because these parts were damaged during earlier disassembling of the model. I drilled the holes on leading edges of both LERX's to install small antennae later (one of these holes is visible on the picture below).
|
|
Air
vents replaced with photoetched parts. Cannon muzzle and big gas vents
behind it are original Academy part, but drilled through. Cannon barrel
from styrene rod is added behind. Almost all panel lines visible on this
picture were rescribed and are different from those originally molded by
Academy. |
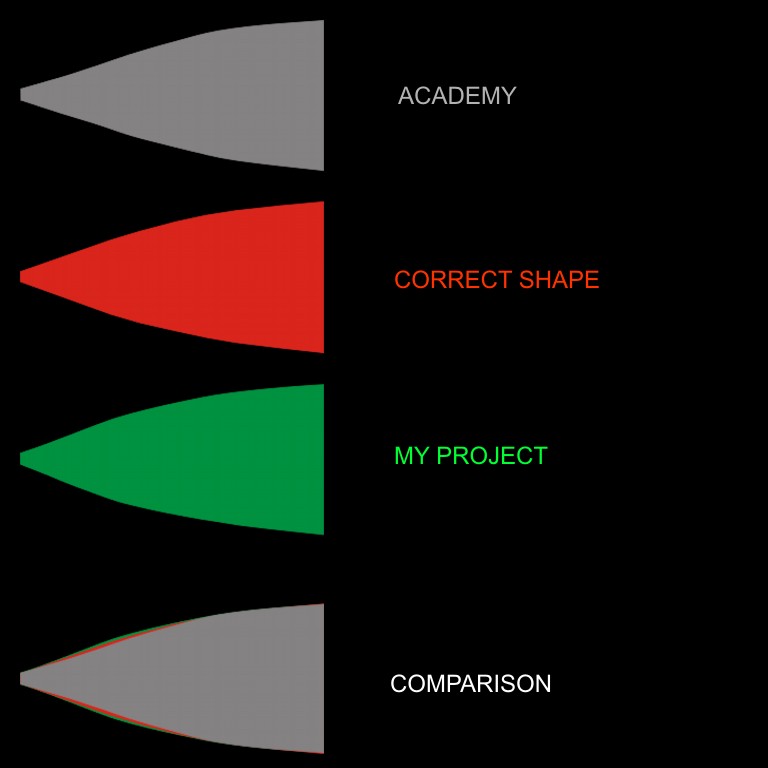
At this point the radome could have been attached. I glued both radome parts together and removed plastic pitot probe. I later made a new one with pieces of surgical needle. And I started to look closely at radome shape...
|
I can accept inaccurate shape as long as it looks fine. But this radome didn't. There was something in this shape that made the whole plane look ugly in my eyes. Correcting this problem was not easy, but I managed to do it, at least partially. The radome was too narrow in its front part so I glued small pieces of sheet styrene to this place and also put a lot of Revell Plasto body putty on and around them. A lot of sanding and polishing followed and I managed to get the shape that may not be perfectly accurate, but it looks much better than the original. Opposite to the Academy part, my radome is now a bit too wide in the front part, but the difference is much smaller than the difference between Academy and the real thing. I guess I could have corrected the shape and achieve better accuracy, but decided to leave it as is. Picture on the right shows all radome shapes including the Academy's ugly one (click on it for a bigger picture). |
Radome shapes |
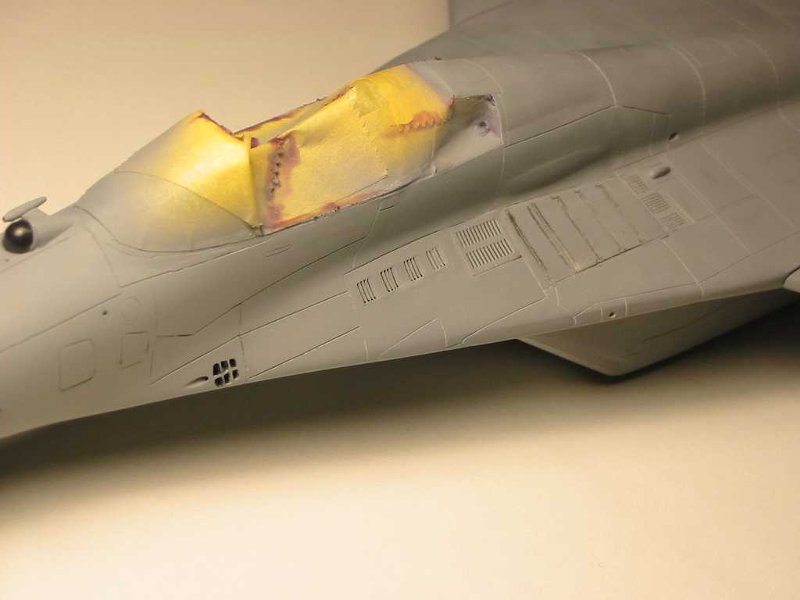
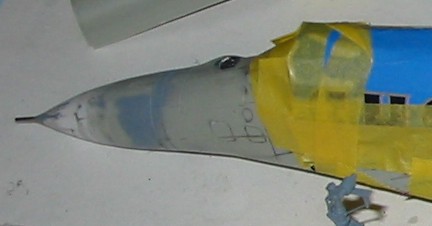
On the picture below you can see where pieces of the white styrene were added. The photo was taken after the first layer of gray primer was applied to the radome and subsequently almost removed during additional sanding that was necessary.
|
Modified radome. You can see that the original pitot tube was removed and replaced with a piece of surgical needle. Two more thinner needle pieces will be added there later. Also note that original kit's KOLS station in front of the windshield was removed. |
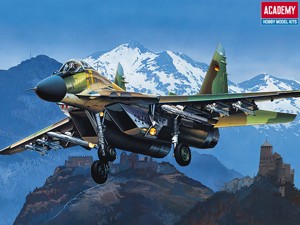
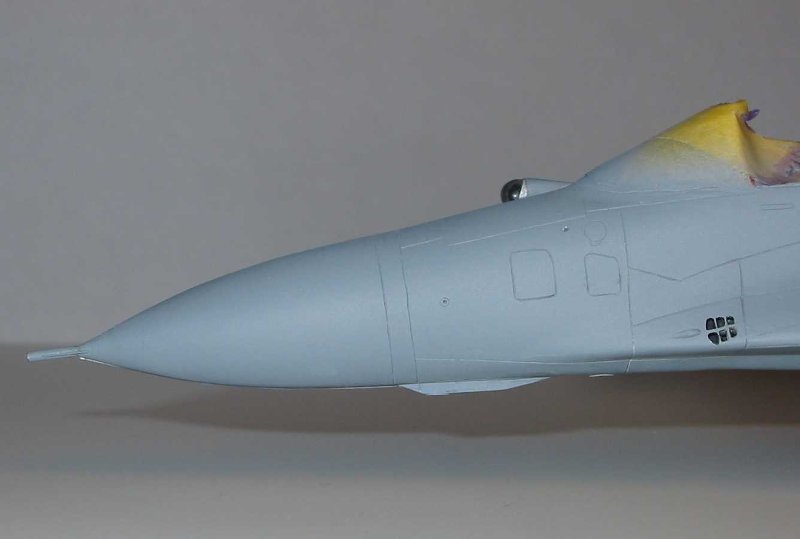
The picture below on the left shows the shape of the finished radome covered with primer. Click on the picture to see enlarged version. You can also notice new KOLS station (read further in the article), vortex generators on the tip, thin cable underneath the radome and if you look closely you can even see the barrel of the gun through the vents :-) The picture on the right is from the Academy website and shows the nose of the "out of the box" model. If you compare these pictures you may notice changed layout of panel lines. I'll get back to that later.
 |
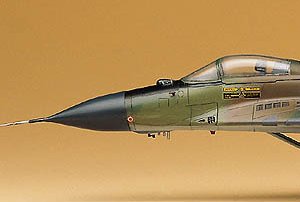 |
On
the left is the nose of my model, on the right is the picture
of the original Academy kit. I think the improvement is noticeable.
After the shape of the radome was satisfactory I used epoxy glue to attach some pieces of lead to the inside to provide some extra weight to the nose of the model. Not much was needed as resin cockpit was probably almost enough to prevent tail sitting. I removed molded on pitot probe from the radome and replaced it with a piece of surgical needle (only one at this point, two others will be added later). I also allached two small photoetched vertex generators to radome tip. Then the radome was attached to the fuselage, also with epoxy glue.
While working on the nose part I decided to correct the shape of KOLS station. As it is a very characteristic part of MiG-29 silhouette I chose to remove the misshaped kit's part and scratch build the new one. The old station was removed before the front parts of fuselage were assembled together. The hole that was left in the plastic was filled with epoxy putty.
I made the transparent ball from the piece of clear sprue, filed to the right shape and then polished with fine wet&dry paper and Tamiya Compound. I drilled a hole in it from behind and put a drop of black paint there. Now I think it was not a good idea - I should have used silver paint, as the ball now looks black and it is hard to notice that it is transparent. Then I put a silver painted thin strip of styrene around it to act as a aluminum mount. The last part - the back cover - was sculptured from the two-piece epoxy putty Poxilina. I decided not to install the front conical protective cover, as it is not mounted when the KOLS station is to be used. I only drilled three mounting holes for it. I filled with putty and sanded smooth the notch for antenna that was located next to the KOLS station in front of the windshield (I will use photoetched IFF antenna, not plastic kit's part).
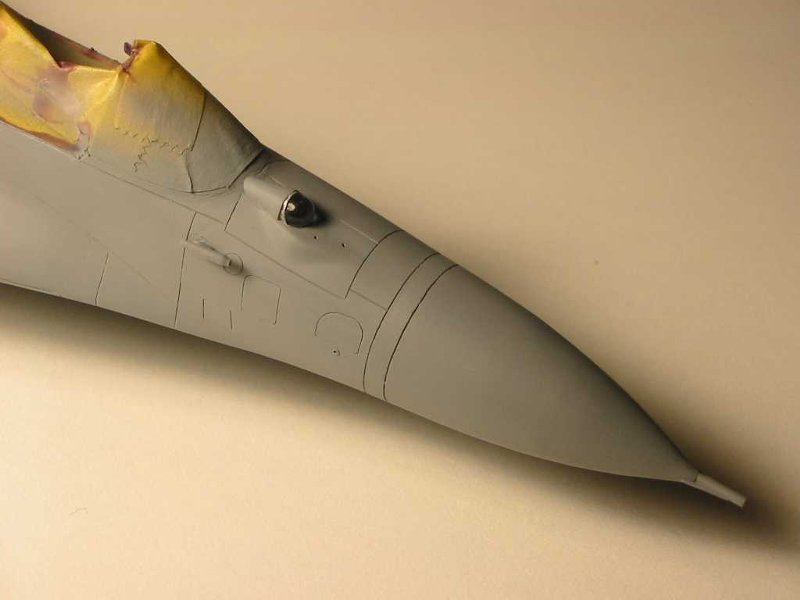
Nose
of the plane with the new KOLS station. The new shape of the radome
and vertex generators on its tip are clearly visible here.
Click on the photo for enlarged version.
![]()
![]()
Copyright © 2003 VODNIK, mailto:pawel@vodnik.net